Toshiba 75UV2F53DB Bruksanvisning
Les nedenfor 📖 manual på norsk for Toshiba 75UV2F53DB (42 sider) i kategorien Fjernsyn. Denne guiden var nyttig for 4 personer og ble vurdert med 4.5 stjerner i gjennomsnitt av 2 brukere
Side 1/42

OPERATING NSTRUCTIONSI
43/50/55/65 UV2F Series
43/50/55/65 UV3F Series
43/50/55/65 QV2F Series
43/50/55/65 QV3F Series

English - 1 -
Table of Contents
Safety Information 2 ....................................................
Introduction 4 ...............................................................
Ultra HD (UHD) 4 .........................................................
High Dynamic Range (HDR) / Hybrid Log-Gamma
(HLG) 4 ........................................................................
Dolby Vision 4 ..............................................................
Accessories Included................................................4
Stand Installation & Wall Mounting 4 ...........................
Antenna Connection 5 .................................................
Other Connections....................................................6
Turning On/O the TV ..............................................7
TV Control & Operation 7 ............................................
Remote Control 9 ........................................................
First-Time Use 10 ........................................................
Using the E-Manual 10 .............................................
Home Screen 10 .......................................................
Connecting to the Internet ...................................11
Setup via Mobile Phone 12 .......................................
Prepare Live TV ...................................................12
Using External Devices........................................12
Using the TV Voice Service 12 .................................
Guidelines 12 ............................................................
Enjoy Live TV .........................................................14
Channel Scan 14 ......................................................
Live Menu 15 ............................................................
Channel Edit 15 ........................................................
Digital Teletext .....................................................16
Programme Info 16 ...................................................
Programme Guide (EPG) 16 ....................................
Programme Recording (PVR) 17 ..............................
Timeshift 18 ..............................................................
HbbTV..................................................................18
Learn about Live TV Support Settings 18 .................
Benets of Smart TV ..............................................19
Using a VIDAA Account 19 .......................................
Voice Service Setup.............................................19
Content Sharing 21 ...................................................
Using Apps...........................................................21
Using the Art App .................................................22
Enjoy the Internet.................................................22
Data Protection and Security 22 ...............................
Usage Mode Setup 23 ..............................................
Using the Mobile App 23 ...........................................
Connecting to External Devices 23 .............................
Remote & Accessories.........................................23
Connecting Bluetooth Devices 24 ............................
Connecting a Set Top Box 25 ...................................
Connecting a Blu-ray or DVD Player 25 ...................
Sharing your Smart Phone/Computer Screen on
the TV ..................................................................25
Connecting USB Devices 25 ....................................
Connecting Headphones 26 .....................................
Connecting Audio Visual (AV) Devices 26 ................
Connecting Speakers or Other Audio Receivers 26 .
Connecting a Digital Audio System with ARC/
eARC 26 ...................................................................
Connecting a PC..................................................27
Settings Overview...................................................27
Picture..................................................................27
Sound 29 ..................................................................
Connection...........................................................30
General 31 ................................................................
Support 32 ................................................................
Using Parental Controls 33 .......................................
Reset to Factory Default 33 ......................................
Entertainment 33 .........................................................
Game 33 ...................................................................
Sports 34 ..................................................................
Media 34 ...................................................................
Play Background Music while Viewing Pictures 34 ..
Audio Format 35 .......................................................
Photo Format 35 .......................................................
Video Format 36 .......................................................
Accessibility Features 37 .............................................
Accessibility Menu Setup 37 .....................................
Audio Type Setup ................................................37
Dialogue Enhancement 37 .......................................
Subtitle Setup 37 ......................................................
Accessible Guide 37 .................................................
Screen Magnication ...........................................37
Voice Guide Setup 37 ...............................................
Troubleshooting 37 ......................................................
FAQ......................................................................37
TV Status Diagnosis 38 ............................................
Wireless LAN Transmitter Specications................39
Licences 39 .................................................................
Disposal Information 40 ...............................................
REACH information 41 ................................................
Conformity Statement 41 .............................................

English - 2 -
Safety Information
CAUTION
RISK OF ELECTRIC SHOCK
DO NOT OPEN
CAUTION: TO REDUCE THE RISK OF ELECTRIC SHOCK DO
NOT REMOVE COVER (OR BACK).
NO USER-SERVICEABLE PARTS INSIDE. REFER
SERVICING TO QUALIFIED SERVICE PERSONNEL.
Note: Follow the on screen instructions for operating the
related features.
In extreme weather (storms, lightning) and long inactivity
periods (going on holiday) disconnect the TV set from the
mains.
The mains plug is used to disconnect the TV set from the
mains and therefore it must remain readily operable. If the
TV set is not disconnected electrically from the mains, the
device will still draw power for all situations even if the TV is
IMPORTANT - Please read these
instructions fully before installing or
operating
WARNING: This device is intended to be
used by persons (including children) who are
capable / experienced of operating such a device
unsupervised, unless they have been given
supervision or instruction concerning the use of
the device by a person responsible for their safety.
Use this TV set at an altitude of less than 5000 metres
above the sea level, in dry locations and in regions
with moderate or tropical climates.
The TV set is intended for household and similar
indoor use but may also be used in public places.
For ventilation purposes, leave at least 5cm of free
space around the TV.
The ventilation should not be impeded by covering
or blocking the ventilation openings with items, such
as newspapers, table-cloths, curtains, etc.
The power cord/plug should be easily accessible. Do
not place the TV, furniture, etc. on the power cord.
you an electric shock. Handle the power cord by the
plug, do not unplug the TV by pulling the power cord.
Never touch the power cord/plug with wet hands as
this could cause a short circuit or electric shock.
Never make a knot in the power cord or tie it with
other cords. When damaged it must be replaced, this
Do not expose the TV to dripping or splashing of
such as vases, cups, etc. on or over the TV (e.g. on
shelves above the TV).
Do not expose the TV to direct sunlight or do
the top of or near the TV.
Do not place any heat sources such as
electric heaters, radiators, etc. near the TV set.
out of the reach of babies, children and domestic
animals.
Carefully attach the stand to the TV. If the stand is
prevent the TV from tilting. Do not over-tighten the
screws and mount the stand rubbers properly.
Do not dispose of the batteries in fire or with
WARNING
Batteries must not be exposed to excessive heat
Excessive sound pressure from earphones or
headphones can cause hearing loss.
ABOVE ALL - NEVER let anyone, especially
children, push or hit the screen, push anything
into holes, slots or any other openings in the TV.
Caution Serious injury or death risk
Risk of electric shock Dangerous voltage risk
Maintenance
Important maintenance
component
Mains Supply
The set should be operated only from a 220-240 V
AC 50 Hz outlet. Make sure the TV or its stand are
not placed . on the power cord DO NOT
mains plug from this equipment, this incorporates a
special Radio Interference Filter, the removal of which
will impair its performance.
in this plug is approved by ASTA or BSI to BS1362.
It should only be replaced by a correctly rated and
approved type. IF IN DOUBT PLEASE CONSULT A
COMPETENT ELECTRICIAN.
Markings on the Product
The following symbols are used on the product as
a marker for restrictions and precautions and safety
instructions.
Note
such information for security reasons.
Class II Equipment: This appliance is
designed in such a way that it does not require
a safety connection to electrical earth.
Hazardous Live Terminal: The marked
terminal(s) is/are hazardous live under normal
operating conditions.
English - 5 -
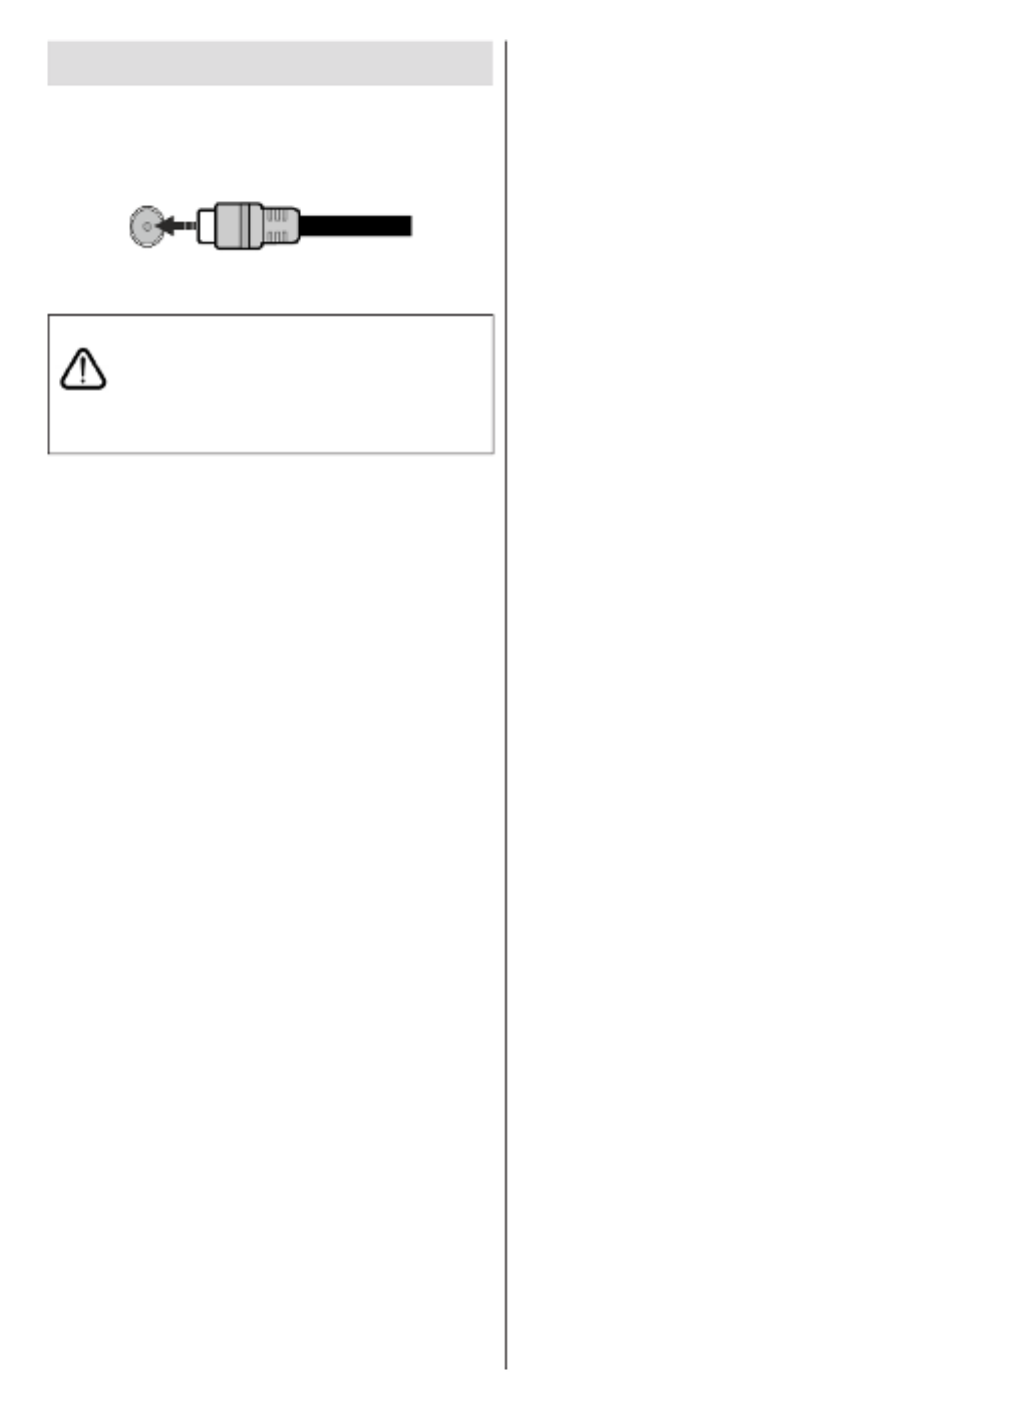
Antenna Connection
Connect the aerial or cable TV plug to the aerial input
(ANT) socket located on the left side of the TV.
Left side of the TV
ANT
Note: You may also connect devices that can receive
broadcast signals such as a Set Top Box.
If you want to connect a device to the TV,
make sure that both the TV and the device
are turned o before making any connection.
After the connection is done, you can turn on
the units and use them.

English - 6 -
Other Connections
If you want to connect a device to the TV, make sure that both the TV and the device are turned o before making
any connection. After the connection is done, you can turn on the units and use them.
Connector Type Cables Device
HDMI
Connection
SPDIF
(Optical Out)
Connection
Headphone
Connection
USB
Connection
CI
Connection CAM
module
Ethernet
Connection LAN / Ethernet Cable
When using the wall mounting kit
(contact your dealer to purchase one,
if not supplied), we recommend that
you plug all your cables into the back
of the TV before mounting on the
wall. Insert or remove the CI module
only when the TV is SWITCHED
OFF. You should refer to the module
instruction manual for details of the
settings. The USB inputs on the
TV support devices up to 500mA.
Connecting devices that have current
value above 500mA may damage
your TV. When connecting equip-
ment using a HDMI cable to your
TV, to guarantee sucient immunity
against parasitic frequency radiation
and trouble-free transmission of high
denition signals, such as 4K con-
tent, you have to use a high speed
shielded (high grade) HDMI cable
with ferrites.

English - 7 -
Turning On/Off the TV
Connect power
IMPORTANT: The TV set is designed to operate on
220-240V AC, 50 Hz socket.
After unpacking, allow the TV set to reach the ambient
room temperature before you connect the set to the
mains.
Plug one end (the two-hole plug) of the supplied
detachable power cord into the power cord inlet on
the rear side of the TV as shown above. Then plug
the other end of the power cord into the mains socket
outlet. The TV will switch to standby mode.
Note: The position of the power cord inlet may dier depending
on the model.
To switch on the TV from standby
If the TV is in standby mode the standby LED lights
up. To switch on the TV from standby mode either:
• Press the Standby Guide Home Prime , , , , Netix
Video Disney+ YouTube free, , Rakuten TV, , ,
sports deezer Freely, or button on the remote
control.
• Press the control button on the TV.
The TV will then switch on.
Note: The remote control buttons may vary depending on
models/countries/regions.
To switch the TV into standby
• Press the button on the remote control.Standby
• Press the control button on the TV, Mixbar menu
options will be displayed. The focus will be on
the current input source option. Press the button
consecutively until the option is Power Off
highlighted. The TV will switch into standby mode.
To switch o the TV
To power down the TV completely, unplug the power
cord from the mains socket.
TV Control & Operation
Your TV has a single control button. This button allows
you to control the Inputs / Channel Up-Down / Volume
Up-Down and Power O-On functions of the TV.
Note: The position of the control button may dier depending
on the model.
Operating with the Control Button
• Press the control button to display the Mixbar menu
options.
• Then press the button consecutively to move the
focus to the desired option if needed.
• To use the Volume Up-Down function, press and hold
the button for about 2 seconds.
To turn the TV off: Press the control button to
display the Mixbar menu options, the focus will be
on the current input source option. Press the button
consecutively until the Power O option is highlighted.
To turn on the TV: Press the control button, the TV
will turn on.
To change volume: Press the control button to
display the Mixbar menu options and then press the
button consecutively to move the focus to Vol+ or
Vol- option. Press and hold the button to increase or
decrease the volume.
To change channel (on TV input source, Live TV
mode): Press the control button to display the Mixbar
menu options and then press the button consecutively
to move the focus to or option.CH+ CH-
To change input source: Press the control button
to display the Mixbar menu options, the focus will be
on the current input source option. Scroll through the
available input sources by pressing the button until the
desired input source option is highlighted.
Note: Live TV settings menu OSD in Live TV mode cannot be
displayed via the control button.
Operation with the Remote Control
Press the button to display or return to the Home
Home screen of your TV. Use the directional buttons
to move the focus, proceed, adjust some settings and
press OK to make selections in order to make changes,
set your preferences, enter a sub-menu, launch an
application, etc. Press to return to the Back/Return
previous menu screen.

English - 8 -
Input Selection
Once you have connected external systems to your
TV, you can switch to dierent input sources. Press the
Source/Input button on your remote control or press
the Home button and move the focus to the Input icon
on the left side of the Home screen, press the OK
button to enter. Press Up and Down directional the
buttons to select the dierent sources and press OK
to switch to the selected input source.
Changing Channels and Volume
You can adjust the volume by using the Volume
+/- buttons and change the channel in Live TV mode
by using the buttons on the remote. Programme +/-

English - 9 -
Remote Control
Inserting the Batteries into the Remote
The remote may have a screw that secures the bat-
tery compartment cover onto the remote control (or
this may be in a separate bag). Remove the screw, if
the cover is screwed on previously. Then remove the
battery compartment cover to reveal the battery com-
partment. Insert two 1.5V - size batteries. Make AAA
sure the (+) and (-) signs match (observing correct
polarity). Do not mix old and new batteries. Replace
only with same or equivalent type. Place the cover
back on. Secure the cover again with the screw, if any.
To pair remote with the TV
Refer to the section Connecting to External Devices
for detailed information on pairing new devices with
your TV. If you experience diculties pairing your
remote with your TV you can turn o other wireless
devices and try again.
1. Input: Shows available broadcast, content
sources and sharing options
2. Numeric buttons: Switches the channel, enters
a number in the text box on the screen
3. Guide: Displays the electronic programme guide
4. Coloured Buttons: Follow the on-screen instruc-
tions for coloured button functions
5. Menu: Displays TV menu
6. Directional buttons: Helps navigate menus,
content, etc. and displays the subpages in TXT
mode when pressed Right or Left
7. OK: Conrms user selections, holds the page (in
TXT mode), views menuChannels
8. Back/Return: Returns to previous screen, pre-
vious menu, opens index page (in TXT mode).
Quickly cycles between previous and current
channels
9. Home: Opens the Home Screen
10. Volume +/-: Increases/decreases the volume
level
11. Microphone button: Activates the microphone
on the remote
12. Subtitle: Opens the subtitle menu where you can
turn subtitles on or o (where available)
13. Free: Launches the VIDAA Free application
14. Sports: Launches the Sports application
15. Netix: Launches the Netix application
16. YouTube: Launches the YouTube application
17. Freely: Launches the Freely platform (UK only)
18. Disney+: Launches the Disney+ application
19. Rakuten TV: Launches the Rakuten TV
application
20. Prime Video: Launches the Amazon Prime Video
application
21. Deezer: Launches the Deezer application
22. Info: Displays information about on-screen
content, shows hidden information (reveal - in
TXT mode)
23. Mute: Completely turns o the volume of the TV
24. Channel +/-: Increases/decreases channel
number
25. Exit: Closes and exits from displayed menus or
returns to previous screen
26. PlayPad: To use a media button on the PlayPad,
press the corresponding directional button or the
OK button on the remote
Use the media buttons to control the playback of
the media. Control elements to play, pause, stop,
rewind and fast forward the media will be available
Press the Up directional button to record a pro-
gramme or press to start timeshift recordingOK
27. Channel List: Opens the channel list
28. Standby: Switches On / O the TV
English - 10 -
First-Time Use
Using the E-Manual
View the embedded E-Manual which contains
information about your TV’s key features.
Disclaimer: Instructions and images throughout this
manual are only for reference and may dier from the
actual product.
Launch the E-Manual
Press the button on your remote control and Home
select .Settings>Support>E-Manual
Enter the Home screen of the E-Manual.
Press the button on your remote control Source/Input
and select , then press the button on Live TV Menu
your remote control and select .E-Manual
Enter Enjoy Live TV chapter to learn more about how
to set up Live TV features.
Press the button on your remote control Source/Input
and select .Connection Guide
Enter Connecting to External Devices chapter to
learn more about how to connect external devices to
your TV and how to set up.
Use the Buttons in the E-Manual
Search
Search for the product feature information, the
E-Manual will provide all the titles and content that
contain the search information.
QR Code
Scan the QR Code with your Smart Phone to open the
E-Manual on your device.
Try Now button
Select Try Now, and it will guide you to the
corresponding TV menu for trying the function.
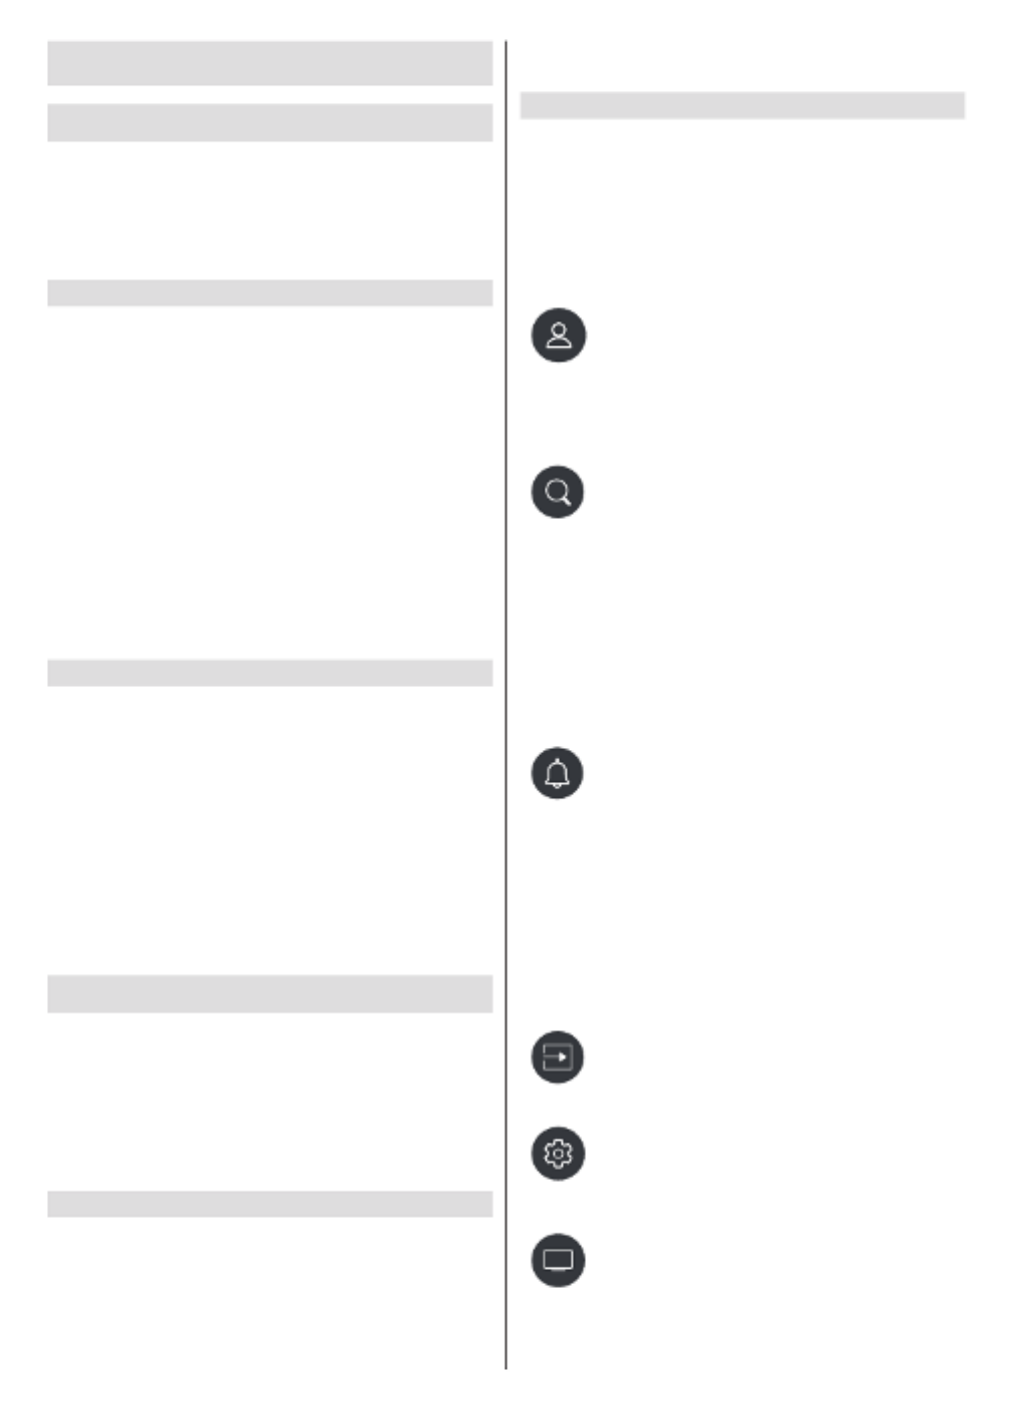
Home Screen
The Home screen is the centre of your TV. All TV
functions can be accessed from the Home screen.
Account , Search, ,Notication Input, Settings and
Live TV icons will be available. You can scroll through
them using the directional buttons.
Note: Indicators or icons may vary depending on models/
countries/regions.
Display the Home Screen
Press the button on your remote control to enter Home
the Home screen.
To exit the Home screen, press the Source/Input
button on your remote control or use the directional
buttons to move the focus to the icon on the left Input
side of the screen, press the button to enter and OK
select your desired input source.
Use the Navigation Bar
The navigation bar refers to indicators and icons on
the top of the Home screen.
Note: Indicators or icons may vary depending on models/
countries/regions.
Account: A VIDAA account provides
all the best features of your Smart TV
and ensures that all services are kept
up to date.
For more information about VIDAA
account, please refer to Benefits of
Smart TV>Using a VIDAA Account in
this manual.
Search: Search the content you want.
Notication: Allow pop-up notications
to appear for useful information and
events that occur with your TV, including:
Advertising Warnings, New Arrivals,
and System Legal Stat ements,
Messages and Alexa Notication.
You can enable/disable each of these
notifications within in the Settings
notication centre.
You can view the list of event messages
generated by the TV.
To delete all notications, select Clear All.
Note:
• The Alexa Notication may not be applicable
in some models/countries/regions.
• When you sign into your VIDAA account,
please nd Notications in VIDAA Account
on the Home screen.
Input: Select the input source depending
on the device you have connected to
your TV.
Settings: Manage TV conguration.
Live TV: Provides quick access to Live
TV. For more information, please refer
to First-Time Use>Prepare Live TV in
this manual.

English - 11 -
Guide: Provides quick access to Guide.
For more information, please refer to
Programme Guide (EPG) in this manual.
Use the shortcuts
You can add inputs, channels and websites to the
Home screen to have quick access to them for your
convenience.
Add and remove channels
• In Live TV, press the button to access the OK
channel list.
• Press the button and press the button Menu OK
to tick channel(s) that you would like to add on the
Home screen.
• Select Add to home. The channel icon will appear
in on the Home screen.shortcuts
Note: To remove the channel from , move the focus shortcuts
to the shortcut, then press and hold the button on your OK
remote control.
Add and remove webpages
• In Browser, visit a website you would like to add on
the Home screen.
• Use the D-pad to move the focus to the Add to
home icon in the top of the Browser navigation bar
and select .Add to home
• Select Add and this webpage will appear in the
shortcuts on the Home screen.
Note: To remove webpages from , move the focus shortcuts
onto the shortcut page, then press and hold the button OK
on your remote control.
Connecting to the Internet
You can access the Internet via your TV, by connecting
it to a broadband system. It is necessary to congure
the network settings in order to enjoy a variety of
streaming content and internet applications. These
settings can be congured from the Settings>Con-
nection>Network menu.
Connect to a Wired (Ethernet) Network
To get access to the Internet using a wired connection,
it is recommended to use a modem or router that
supports Dynamic Host Configuration Protocol
(DHCP). Modems and routers that support DHCP
automatically provide the IP address, netmask,
gateway, DNS Server 1 and DNS Server 2, so you do
not have to enter them manually. Most home networks
already have DHCP.
2
3
1
1. Broadband ISP connection
2. LAN (Ethernet) cable
3. LAN input on the rear-left side of the TV
After connecting to a wired (Ethernet) network,
press the button on your remote control, and Home
select Settings>Connection>Network>Network
Conguration.
Set the TV network by selecting Network Congura-
tion OKand press the button to enter the submenu.
• Connection Type
Choose a wired (Ethernet) network connection to
access the Internet.
• Ethernet
Display network status.
• IP Settings
Congure the IP setting for your network connection.
Connect to a Wireless Network
To connect to an available wireless network, make
sure that you turn on your wireless router and have the
wireless router's SSID and password before attempting
to connect.
1

English - 12 -
1. Broadband ISP connection
To get access to the Internet using a wireless connection,
press the button on your remote control, and Home
select Settings>Connection>Network>Network
Conguration.
Set the TV network by selecting Network Congura-
tion OKand press the button to enter the submenu.
• Connection Type
Choose a wireless network connection to access
the Internet.
• Refresh
Refresh wireless network.
• Advanced Settings
Congure the advanced wireless network settings
for the TV.
• Add
You can add a wireless network.
Note:
• If no wireless router is found, select and enter the Add
network name in the SSID.
• If no wireless router is found, select .Refresh
Setup via Mobile Phone
When you turn on the TV for the rst time, the TV will
support setup via your smart device by scanning the
QR code.
If you scan the QR code to allow setup via the mobile
app, setup of the TV will be more ecient.
Before performing setup with the mobile app, please
make sure your mobile device has Bluetooth activated
and is connected to the same network as your TV.
Note: The setup above is for referencing purpose and may
dier depending on models/countries/regions.
Prepare Live TV
Start auto scan or manual scan
• Press the button on your remote Source/Input
control and select .Live TV
• Press the button on your remote control Menu
and select Settings>Channel>Auto Scan or
Settings>Channel>Advanced Settings>Manual
Scan.
Using External Devices
Access to connected external devices including
wireless connected devices.
Switch between external devices connected to
the TV
• Press the Source/Input button on your remote
control or press the button and move the Home
focus to the icon on the left side of the Home Input
screen, press the button to enter.OK
• Select your desired input source.
Edit the name of input sources
• Press the Source/Input button on your remote
control or press the button and move the Home
focus to the icon on the left side of the Home Input
screen, press the button to enter.OK
• Move the focus to an input source and press the
Menu button on your remote control to edit the name
of input sources.
• Select .Enter
Note: Some input sources cannot be renamed.
Using the TV Voice Service
Select Voice Service on the TV
To access the Voice Service and select a voice
assistant:
• press the button on your remote control;Microphone
• or press the Home Settings button and select the
icon, and select System>Voice Service.
Use the remote microphone
You can enjoy interacting with voice assistant
using your voice by just pressing and holding the
Microphone button on your remote control.
Note:
• The Microphone button may not be available on some
remote control models.
• Voice Service feature may not be applicable in some models/
countries/regions.
• To use this function, End User Licence Agreement and
corresponding Smart feature privacy policy/terms and
conditions may be required to be agreed to.
Guidelines
Note:
• Guidelines content is only applicable in some countries.
• The actual design of remote control could dier.
How are TV channels sorted and why?
Channel sorting
The availability of individual channel may depend on
the selected reception path, such as satellite (DVB-S/
S2), aerial (DVB-T/T2) or cable (DVB-C) and the
signal strength.
Standard or an operator (Astra 19.2°, Vodafone (NRW,
Hessen, BW or Pÿur) can be selected for automatic
channel search.
To sort channels when selecting an :Operator
When an operator is selected, the channels are sorted
based on the operator's criteria.

English - 14 -
• Select a channel in a favourite list, press the Left
directional button to move it.
• Select a channel in a favourite list, press the Right
directional button to remove it.
Apps
Home>More Apps
Factory installed apps:
Select the item you want to move, then long press the
OK button, use the D-pad to move it, and press the
OK button to store position.
Non-factory installed apps:
Select the item you want to move, then long press the
OK button, use the D-pad to move it, and press the
OK button to store position.
Note: Some apps cannot be moved.
How are recommendations created?
Recommendations on the platform are dependent
on the ability and willingness of partners to provide
metadata to the platform. The content is positioned
depending on the following criteria:
Above the fold applications:
The recommendations originate from the Content
partners that are highlighted. They are in the domain
of the end-user.
Below the fold applications:
Recommendation rows are created by the editorial
team, following these guidelines:
• Content variety – Providing a broad selection of
content
• Type of access variety – Providing advertising-
supported, subscription, and transactional content
• Balance – Providing a balance between global and
local content
Enjoy Live TV
Channel Scan
You can scan for channels automatically or manually.
Auto Scan
• Press the button on your remote Source/Input
control, and select .Live TV
• In Live TV, press the button and select Menu
Settings>Channel>Auto Scan.
If no TV channels were saved before, you will be
prompted to do a channel scan.
Satellite
• Single satellite: You can use single satellite if you
only have one satellite installed.
• DiSEqC: You can choose DiSEqC if you have
DiSEqC equipment. Up to four satellites in DiSEqC
1.0 mode can be installed.
If you are using a motorised dish, you can use
DiSEqC 1.2 mode.
• Unicable: If your home is equipped with Unicable
satellite distribution, you should use this option.
Please make sure that you know the Unicable band
and frequency to be used. The information should
be available on the equipment or the landlord can
provide it.
• Jess: If your home is equipped with Jess satellite
distribution, you should use this option.
Please make sure that you know the Unicable band
and frequency to be used. The information should
be available on the equipment or the landlord can
provide it.
Aerial
• Channel: Free Select from or All Channels
Channels. This option may not be available
depending on countries/regions/operators.
• Scan Mode: Select from digital channels only
(DTV), digital and analogue channels (DTV+ATV)
or analogue channels only (ATV).
If you receive DVB-T or DVB-T2 signal, you can
use DTV.
• LCN: Switch on/o LCN (Logical Channel Number).
Please note that some operators are restricted to
manually change the channel order. If you switch
o LCN, then the channel list can be edited after
channel scan.
This function may not be applicable in some models/
countries/regions.
Cable
• Channel: Free Select from or All Channels
Channels. This option may not be available
depending on countries/regions/operators.
• Scan Mode: Select from digital channels only
(DTV), digital and analogue channels (DTV+ATV)
or analogue channels only (ATV).
• Search Mode: Frequency ScanSelect from or
Network Scan.
• Network ID: Enter the network ID value manually.
This option will appear greyed out if the Search
Mode option is not set to Network Scan.
• Start Frequency: Enter the start frequency value
manually. This option will appear greyed out if the
Search Mode option is not set to Network Scan.
• LCN: Switch on/o LCN (Logical Channel Number).
Please note that some operators are restricted to
manually change the channel order. If you switch

English - 15 -
o LCN, then the channel list can be edited after
channel scan.
This function may not be applicable in some models/
countries/regions.
Note: Satellite/aerial/cable function may not be applicable in
some models/countries/regions.
Manual Scan
Manually scan for channels for DTV or ATV.
• Press the Source/Input button on your remote
control, and select TV.
• In Live TV, press the button on your remote Menu
control and select Settings>Channel>Advanced
Settings>Manual Scan.
DTV Manual Scan
Manually scan for DTV services.
When the DTV Manual Scan screen appears, press the
Left/Right directional button to select Aerial, Cable or
Satellite and congure corresponding settings. Then
select Start to commence the search of that channel.
When the signal has been received, the signal strength
will be displayed on the screen.
ATV Manual Scan
Manually scan for ATV services.
• Frequency: Input the channel frequency you want.
• Picture System: Select the Colour System.
• Sound System: Select the Sound System.
Live Menu
You can obtain quick access to the channel list,
favourite channel list or use relevant features with ease
when watching TV programmes.
Display Channel List
In Live TV, press the button on your remote control OK
to display the Channel List menu.
Alternatively, in Live TV, press the button on your Menu
remote control and select .Channel List
Learn about channel list sub-menu
In Live TV, press the button on your remote control OK
and press the Right directional button.
• TV List
Display Live TV channel categories, such as Cable.
• FAV1-4
Display favourite lists 1 to 4.
• Filter
Select channels by Content HD, , Channel Block,
Scrambled Sort and .
Some options in may not be available in some Filter
models/countries/regions.
• Edit
Edit the channel list.
Note: The sub-menu options may vary depending on models/
countries/regions.
Display Favourite Channel List
In Live TV, press the OK button on your remote control
and press the Right directional button, then select
FAV1-4 to display the favourite list.
Learn about the On-Screen Menu
In Live TV, press the button to access the on-Menu
screen menu.
• Channel List
Quick access to Channel List.
• Guide
Quick access to Guide (EPG).
• Subtitle
Turn on Subtitle function or select subtitle option for
digital broadcast content.
• Recording List
Quick access to Recording List.
• PVR
Launch Schedule Recording.
• Timeshift
Launch Timeshift.
• HbbTV
Enable or disable HbbTV functionality for the current
channel (only available for digital channels).
• E-Manual
Enter Enjoy Live TV chapter to learn more about how
to set up Live TV features.
• Audio Only
When you select this option, the screen will not
display the picture. You can only listen to the audio.
Press any button except the button, Standby
Volume +/- buttons and Mute button to restore the
picture.
• Settings
Set up picture, sound, connection, channel,
accessibility, system and support.
Note: Some menus above may not be available in some
models/countries/regions.
Channel Edit
Manually edit the channel list or favourite channel list
to your preference.

English - 16 -
Edit Channel List
Before you can edit the channel list, Channel Scan
must be completed rst.
In Live TV, press the button on your remote control OK
and press the Right directional button to select a Live
TV channel category such as , then use D-pad Cable
to select .Edit
Alternatively, in Live TV, press the button, select Menu
Settings>Channel>Channel Edit, and select a Live
TV channel category such as .Cable
Manage the channels
• Press the OK button on the selected channel, then
a checkbox will appear. You can select multiple
channels at the same time to move or delete.
• Move: Press the Left directional button to move the
selected channel.
Moving the channels could be restricted by the
operator. If you want to be able to move channels, it
is not recommended to choose an operator during
channel scan, and LCN should be set to O.
• Delete: Press the Right directional button to delete
the selected channel.
• Restore: Press the Red button to enter the list of
deleted channels. Press the Left directional button
to restore the deleted channel.
• Filter: Press the Yellow button, the lter screen will
pop up. Press the button to select options, the OK
channel list will then be updated.
• Search: Press the Blue button to search for a
channel.
Export the channel list to USB
The current channel list can be exported to a USB
storage device.
In Live TV, press the button on your remote Menu
control and select Settings>Channel>Channel
Edit>Export to USB.
Import the channel list from USB
Previously exported channel lists can be imported via
a USB storage device.
In Live TV, press the button on your remote Menu
control and select Settings>Channel>Channel
Edit>Import from USB.
Edit Favourite Channel List
Before you can edit the favourite list, Channel Scan
must be completed rst.
Add a channel to a favourite list
You can add channels from various reception types
to the favourite list.
• In Live TV, press the button to display the OK
channel list.
• Press the Menu button and select the channel(s)
you want to add to the favourite list.
• Select Add to Favourite and choose from FAV1-
FAV4.
• Then, a heart-shape icon will appear next to the
added channel.
Move or remove channels in a favourite list
In Live TV, press the button on your remote control OK
and press the Right directional button, select FAV1-4,
then use D-pad to select .Edit
Alternatively, in Live TV, press the button on your Menu
remote control and select Settings>Channel>Channel
Edit FAV1-FAV4, then select .
You can add, move, or remove favourite channels.
• Select Add channels to add the selected channel
to the favourite list.
• Select a channel in a favourite list, and press the Left
directional button to move it.
• Select a channel in a favourite list, and press the
Right directional button to remove it.
Digital Teletext
Adjust Teletext decoding. This function may not be
applicable in some models/countries/regions.
Programme Info
While watching TV programmes, you can use the guide
eld at the top of the screen or guide button on remote
control for programme info details. The information
listed below will be available on the info bar.
• Channel logo
• Channel number
• Channel name
• Indicator of Favourite
• Add to home
• Date and time, and channel category
• Current programme
• Next programme
Note: The remote control buttons may vary depending on
models/countries/regions.
Programme Guide (EPG)
The Guide (EPG) provides a convenient way to
check TV programmes for the upcoming 8 days. The
information displayed by the Guide (EPG) is made
available by the commercial television networks for
digital channels only. The availability and amount of
programme information will vary depending on the
broadcaster.
Note: The Guide (EPG) function is only available for digital
channels. Analogue channels are not supported.

English - 17 -
Launch the Guide
In Live TV, press the button, or press the Guide Menu
button and select to display programme Guide (EPG)
guide. Alternatively, press the button and select Home
the Guide icon in the left navigation bar on the Home
screen.
Note: Indicators or icons on the Home screen may vary
depending on models/countries/regions.
Learn about the Guide menu
• Watch
In Guide (EPG), when a current programme is
selected, press to switch to the channel you want OK
to see.
• Programme Information
In Guide (EPG), press the Up/Down directional
button to select the channels. Press the Left/Right
directional button to select programme based on the
time schedule.
Press the button to see programme information.OK
Programme Recording (PVR)
The PVR function allows you to easily record digital
television content for later viewing.
Read before Recording Programmes
• To use PVR, you must connect a storage device for
recording. PVR will not function if a data storage
device has not been connected.
• The format of the storage device can be NTFS or
FAT32. The storage space of your device should
be no less than 2GB (for 15 minutes high-denition
video). It is strongly recommended to use a USB
mobile hard disk drive instead of a USB ash drive
as the storage device.
• If the transfer rate of your hard disk is too slow, a
pop-up notice will be displayed. In this case, you will
need to use another disk with higher speed.
• PVR is only available for digital channels and does
not support analogue channels.
• Some broadcasters may restrict the recording of
programmes.
• If a recording is made from a locked channel, the
system PIN will need to be input to playback the
recorded content.
• Some channel-related conguration may conict
with background recording. In this case, a reminder
window will pop up.
• The PVR function may not be applicable in some
models/countries/regions.
Recording
Schedule Recording
In Live TV, press the button and select .Menu PVR
If your remote has the button, press it and Pause/Play
use D-pad to select record icon to set up PVR.
You can select recording mode from Time Manual ,
stop Programme and .
When you select time, you can set the booking time
and period.
In Live TV, press the button and select Menu
Recording List>Scheduled to view the scheduled
recording. In the schedule recording list, you can
readjust the reservation information that has been set.
Standby Recording
If you press the button during recording Standby
your TV will go into standby mode, but the recording
process will continue. If you press the button Standby
again to wake up the TV, the recording process will not
be aected. After recording, the recorded le will be
automatically saved to the attached USB disk
Background Recording
When you switch to an app or another source (e.g.
HDMI) during recording, the recording process will
continue. When the recording has completed, the
recorded programme will be automatically saved to
the attached USB disk.
If you want to manually stop recording, press the
Source/Input button on your remote control and select
Live TV to switch back to the channel that is currently
being recorded, and then press the button and Menu
select .PVR
If your remote has the button, press it and Pause/Play
use D-pad to select record icon.
Then select the stop button icon on-screen to stop.
Learn about the recording control bar
The items listed below will be available on the control
bar.
• Recording time
• Total time
• Rewind button
• Pause / Play button
• Fast forward button
• Stop button
Note: The PVR function may not be applicable in some
models/countries/regions.
Recording List
Access recording list
In Live TV, press the button on your remote Menu
control and select .Recording List

English - 21 -
Yandex Smart Home Service Setup
Yandex Alice voice assistant can obey certain
commands to help you change the TV’s conguration.
Before setting up Yandex Smart Home Service,
connect your TV to the network and sign into your
VIDAA account at . For more Home>Account
information about how to sign into the VIDAA account,
please refer to Benets of Smart TV>Using a VIDAA
Account in this manual.
STEP 1: Set up Yandex on TV
• Press the button on your remote control and Home
select the icon, then select Settings System>Voice
Service>Yandex Set up now. Select .
• Sign into your VIDAA account. If you have signed in
before, this step will be skipped.
• Give your TV a name.
STEP 2: Set up in Yandex App
Follow the instructions on the TV to enable Yandex
Smart Home Service.
• Download the Yandex app on your mobile device.
• Open the app and sign into your Yandex account.
• In the Yandex app, go to “Devices” > “Smart Home”,
click add device icon and select “VIDAA Voice”.
• Merge Account by signing in to your VIDAA account.
Yandex Smart Home Service is set up and ready.
Now you can control your Smart TV with Yandex Alice
devices or the Yandex app to change channel, change
inputs, adjust volume and more, just by asking Alice.
Note:
• The Yandex function may not be applicable in some models/
countries/regions.
• The setup steps above may vary. Please refer to the
specic product.
Voice Service Other Issues
If you want to turn on your TV with Alexa-enabled
devices (e.g. Echo, Echo show) or Google Home
devices (e.g. Google Home, Google Nest Hub), please:
• Turn on and Wake on LAN Wake on Wireless
Network Home>Settings>Connection>Network. at
• Make sure your TV and Alexa-enabled devices/
Google Home devices are connected to the same
network environment.
Note: Only Alexa (Alexa skill is enabled) and Google Smart
Home Service support turning on your TV with Alexa Echo
or Google Home.
Content Sharing
Content Sharing allows you to view media content, like
videos, music or photos saved on your Android/iOS/
PC device on your TV screen.
Share Media Content from your Device
• Connect your TV and Android/iOS/PC device to the
same network.
• Turn on Content Sharing at Home>Settings>
Connection>Mobile Device Connection>Content
Sharing.
• Turn on the content sharing function on your Android/
iOS/PC device.
• Find the TV name in the search list of your device
and select it. Wait for the connection progress to
complete.
• On your Android/iOS/PC device, choose the media
content you want to share on your TV.
Play Media Content from your Device on the TV
You can connect media content saved on your Android/
iOS/PC device to your local network and play the
content on your TV.
• Connect your TV and Android/iOS/PC device to the
same network.
• Turn on Content Sharing at Home>Settings>
Connection>Mobile Device Connection>Content
Sharing.
• Make sure your media content on your Android/iOS/
PC device are visible through the local network.
• On your TV, select a device with media content at
Home>Input Home>media, or .
The media content listed on your Android/iOS/PC
device appears.
• Select a media content item from the list to play.
Note:
• Some Android/iOS/PC devices may not support content
sharing function. If your device does not support content
sharing, you can download an app that supports the function
to connect to your TV. For more information, please refer
to Benets of Smart TV>Using the Mobile App in this
manual.
• Content may not be played depending on the le format.
• Content may not be played smoothly, or the function may
not work properly due to the network condition.
Using Apps
Press the button on your remote control.Home
Numerous factory-installed apps are available for you
to choose for your entertainment preferences.
Install an App from App Store
Even though your TV has numerous factory-installed
apps, there may be others that you would like to
download.
To install an app:

English - 25 -
• This function may not be applicable in some models/
countries/regions.
Listen to the Audio through Bluetooth Devices
Pair the Bluetooth audio device using the TV's
Bluetooth setup process. Refer to the user manual for
your audio device, such as Bluetooth speaker or sound
bar, for detailed connection and setup.
After the Bluetooth connection is completed, press
the Home button on your remote control, and select
Settings>Sound>Audio Output, then select BT
Sound Bar/Bluetooth Speaker option to listen to the
audio through Bluetooth devices.
Note:
• Compatibility issues may occur depending on the Bluetooth
device.
• The TV and Bluetooth devices may become disconnected
if the distance between them is too long.
• This function may not be applicable in some models/
countries/regions.
Listen to your Mobile Device Audio through
the TV
Press the button on your remote control Home
and select Settings>Connection>Bluetooth>TV
Bluetooth Speaker.
Mobile devices are connected to the TV via Bluetooth
and audio is played via the TV speaker.
When your mobile device is connected to the TV via
Bluetooth, you can play your mobile device music
through the TV built-in speakers.
Go to your mobile settings to enable Bluetooth and
choose the TV to connect.
To use this function, make sure to select TV Speaker
at .Home>Settings>Sound>Audio Output
Note: This function may not be applicable in some models/
countries/regions.
Connecting a Set Top Box
Before connecting a Set Top Box to the TV, make sure
the TV and Set Top Box are switched o.
Most STB's can be connected via HDMI, HDMI
oers the best picture and sound quality. For more
information about how to connect a Set Top Box to
your TV, please refer to Connecting to External
Devices>Connecting Audio Visual (AV) Devices
in this manual.
When the connection is completed, turn on your TV and
Set Top Box, switch to the input source by pressing the
Home Input button, then select the icon on the Home
screen or press the button to change Source/Input
to the port that you connected your Set Top Box to.
Connecting a Blu-ray or DVD Player
Before connecting a Blu-ray or DVD player to the
TV, make sure the TV and Blu-ray or DVD player are
switched o.
It is recommended to connect your devices with a
HDMI cable (if HDMI port is available) to enjoy better
picture and sound quality. For more information
about how to connect a Blu-ray or DVD player to
your TV, please refer to Connecting to External
Devices>Connecting Audio Visual (AV) Devices
in this manual.
When the connection is completed, turn on your TV
and Blu-ray or DVD player, switch to the input source
by pressing the button, then select the Home Input
icon on the Home screen or press the Source/Input
button to change to the port that you connected your
Blu-ray or DVD player to.
Sharing your Smart Phone/Computer
Screen on the TV
Before using the feature, please set your TV to the
wireless network connection.
Press the button on your remote control Source/Input
and select .Screen Sharing
• Turn on the casting function of your Android/
Windows 10/computer device. The setting icon may
vary depending on the device. The feature may be
called "Wireless display", "Smartview", "Wireless
projection", etc.
• Find the TV name in the search list of your device
and select it. Wait for the connection progress to
complete and the content on your device will be
displayed on the TV.
Press the button on your remote control, select Home
Setting>Connection>Mobile Device Connec-
tion>Screen Sharing and switch it to on. Then, you
can share your device's screen directly without opening
the Screen Sharing App on your TV.
Note:
• Some devices may not support casting.
• This function may not be applicable in some models/
countries/regions.
Connecting USB Devices
Connect USB devices, such as hard drives and USB
memory sticks for browsing photos or listening to
music.
Read before connecting USB devices
USB disk sizes 4GB, 8GB, 16GB, 32GB, 64GB, 128GB
and other common market sizes are supported. Up to
8TB hard drives are supported.
Supported formats: NTFS, FAT32.

English - 26 -
Select the content you want to play or view. For more
information, please refer to in Entertainment>Media
this manual.
Use the USB storage device function
The USB storage device function can be used to record
and view digital broadcast programmes.
Read the precautions below before recording or
viewing programmes by using the USB storage device
function.
Note:
• Be sure to select the correct country/region for use.
• Use of the recording function may not be applicable
depending on the selected country/region. Use with incorrect
settings may violate certain laws or other regulations, and
may result in criminal punishment. In such cases, our
CORPORATION and the Group shall bear no responsibility
whatsoever.
• Recorded programmes saved on the USB storage device
can only be viewed on this TV. They cannot be viewed when
connected to another TV (including the same model of TV),
a PC, or other devices.
• You cannot watch one channel while recording another.
• If the recording time to the USB storage device is too short,
no data may be saved.
• You cannot record video input signals on the USB device.
• Not all types of broadcast may be recordable.
• After programming the TV to record digital broadcasting,
do not disconnect the power plug before recording starts.
• If video or audio recording fail due to malfunction of the TV
or poor reception, no compensation shall be paid.
• Certain USB storage devices may not be compatible with
the TV.
Connecting Headphones
You can connect a pair of headphones (not provided)
to the HEADPHONE port on your TV. While the
headphones are connected, the sound from the built-in
speakers will be disabled.
Note:
• Headphone port may not be available on some models.
• Headphones with microphones are not supported.
Connecting Audio Visual (AV) Devices
Connect with a composite video cable
To connect an AV device with a composite video cable
(not provided), see the section.Other Connections
When the connection is completed, press the Source/
Input button on your remote control and select AV as
the input source.
Note:
• AV IN port(s) may vary depending on model type.
• AV IN port(s) may not be available on some models. Please
use other port(s) to connect AV devices.
• For some models, RCA Jack to AV cable may not be
supplied.
Connect with a HDMI cable
To connect an AV device with a HDMI cable (not
provided), see the section.Other Connections
When the connection is completed, press the Source/
Input button on your remote control and select the
corresponding HDMI input.
Note:
• Please refer to the user manual of your device for step-by-
step instructions.
• Some devices, such as DVD players, require the HDMI
signal to be set to the correct format in the device settings.
Please consult your device's user manual for instructions.
• If there is no sound from your TV, congure the device
audio settings.
Connecting Speakers or Other Audio
Receivers
To connect speakers or other audio receivers
with an audio cable (not provided), see the Other
Connections section.
Ensure the audio connected devices are switched on
before switching on the TV.
When the connection is completed, press the Home
button on your remote control, select Settings>-
Sound>Audio Output SPDIF and select the option.
When a digital audio system is connected to the
DIGITAL AUDIO OUT port, decrease the TV volume
and use your digital audio system to control the volume.
Note:
• If you prefer to use Audio Return Channel (ARC) or
enhanced Audio Return Channel (eARC), please refer to
Connecting to External Devices>Connecting a Digital
Audio System with ARC/eARC in this manual.
• You can connect the DIGITAL AUDIO OUT port on the back
of the TV to the optical port on the amplier. Then press
the Home button on your remote control and set the Audio
Output Settings>Sound ARC option in the menu to or
SPDIF to set the Digital Audio Output Format to Dolby
Audio - Dolby Digital to receive the Dolby Digital audio
on the amplier.
Connecting a Digital Audio System
with ARC/eARC
If you would like to use the Audio Return Channel
(ARC) or enhanced Audio Return Channel (eARC)
feature to send sound from the TV by a HDMI cable
to a digital sound system, you can connect it to the
HDMI (ARC/eARC) port of your TV.
By using this feature, you can also control the sound
system with your TV remote instead of using the
remote controls from the connected devices.
After the connection:

English - 27 -
• Power on the sound system.
• Press the button and select the icon Home Settings
on the Home screen.
• Select Sound>Audio Output, and choose ARC
option. If the device supports eARC function, press
the Home button and select the Settings icon
on the Home screen, then select Sound>Audio
Output>HDMI-eARC eARC Onto set to .
Note:
• Audio receiver must support ARC/eARC function.
• If the device has an Input Selector feature, then make sure
to change it to TV.
• When this port is used for ARC/eARC function, it can be used
as signal input when a DVD is connected to an amplier and
the amplier is connected to the TV at the same time. Some
ampliers may not support series connection.
• 5.1 CH (channel) audio is available when the TV is
connected to an external device that supports 5.1 channel
surround sound. You can press the button and select Home
the Settings icon on the Home screen, and set the Audio
Output Sound ARC SPDIF option in the menu to or to set
the Digital Audio Output Format Dolby Audio - Dolby to
Digital Plus to receive the 5.1 channel audio.
Connecting a PC
You can connect a PC to the TV with a HDMI cable to
use your TV as a PC monitor.
After connecting the PC, press the Source/Input
button and select the connected PC as the input
source.
Note:
• For better image quality, set the PC's resolution to a format
which is supported by the TV.
• If there is no sound from your TV, change the PC's audio
settings.
• If you want to connect your PC and TV wirelessly, please
refer to Benefits of Smart TV>Content Sharing or
Connecting to External Devices>Sharing your Smart
Phone/Computer Screen on the TV in this manual.
Settings Overview
Picture
Adjust picture mode, picture size and other advanced
picture settings.
Choose a Picture Mode
Press the button on your remote control and Home
select .Settings>Picture>Picture Mode
Select a pre-set picture mode to best suit the content
you are viewing.
Note: Options may dier depending on your model/country/
region and the content you are watching. Please refer to the
specic product.
When you use a normal signal
Enhanced(ACR): Utilizing voiceprint matching
technology, intelligently adjusting sound and image
quality, providing a good visual experience. After
the user activates the automatic content recognition
function and intelligent adjustment of sound and image
quality, the device obtains the audio information played
by the user, converts it into voiceprint, and transmits
it to the server. The server matches the type of the
voiceprint in the voiceprint database and returns it
to the device. The device obtains the target sound
quality and image mode index based on the matching
relationship table between the voiceprint type obtained
from the cloud and the sound quality and image quality,
and adjusts the sound quality and image quality to
the target mode. Provides a good auditory and visual
experience.
Standard: Use Standard mode for watching normal
content, such as News, Drama or Documentaries.
Cinema: Use Cinema for watching movies.
Energy Saving: Optimised picture for energy saving.
Dynamic: Use Dynamic mode for content that requires
vivid picture quality.
Sports: Optimised picture for watching sports.
Advanced Picture Settings Setup
Press the button on your remote control and Home
select Settings>Picture>Picture Mode Settings.
Adjust display settings for each Picture Mode. You
can personalise the picture quality by adjusting the
following settings. Options may not be applicable
depending on your model/country/region and the
picture mode you selected.
The following options may dier depending on model
type, please refer to the actual product.
Apply Picture Settings: Apply current picture mode
settings to all the input sources or just the current
source.
Backlight: Set the overall brightness of the screen.
Note: The function name may vary depending on the model
type.
Brightness: Adjust the Brightness level to generate
lighter or darker images.
Contrast: Adjust the Contrast level to increase or
decrease how bright images appear.
Colour Saturation: Adjust the colour intensity of the
picture for a more vibrant image.
Sharpness: Adjust how sharp or soft the edges of
images appear.
Advanced Settings: Adjust the colour space and
Gamma to best suit the content you are viewing.

English - 31 -
Note: Bluetooth function may not be applicable in some
models/countries/regions.
Device Management
Manage authorised devices for device control.
Mobile App Download
Press the button on your remote control and Home
select Settings>Connection>Mobile App Download.
Install mobile app on your smartphone to control your
TV. This app is available on both Android and iOS.
General
You can set up system settings.
Note: The menus displayed vary depending on models/
countries/regions.
Set Time
Press the button on your remote control and Home
select .Settings>System>Time
Set the current time based on your location.
Time Format: Set the time display to be 12 or 24-
hour format.
Date/Time: Set the Date and Time. You can set the
date and time to automatically sync with the Internet/
broadcast or manually setup by yourself.
This function may not be applicable in some models/
countries/regions.
Time Zone: Select your time zone.
This function may not be applicable in some models/
countries/regions.
Daylight Saving: Select whether to apply Daylight
Saving Time to the TV.
This function may not be applicable in some models/
countries/regions.
Use Timer
Press the button on your remote control and Home
select .Settings>System>Timer Settings
Adjust the timer settings to suit your preference.
Sleep Timer: Set the sleep timer to automatically turn
the TV o at the specied time.
Power On Timer: Set the time you want the TV to turn
on automatically. You can set the same time each day
or set a dierent time on dierent days.
Power O Timer: Set the time you want the TV to turn
o automatically. You can set the same time each day
or set a dierent time on dierent days.
Menu Timeout: Set the amount of time you would like
the menu to remain on the screen.
Auto Sleep: Set the amount of time that you would like
the TV to auto power o after a period of no activity.
This function may not be applicable in some models/
countries/regions.
Auto Standby with No Signal: TV will go to standby
if there is no signal after the set time.
Set Language and Location
Press the button on your remote control and Home
select .Settings>System>Language and Location
Select the language used for this TV and your location.
Location: Choose the location from where you will
watch your TV.
Postcode: User can change the Postcode. This
function may not be applicable in some models/
countries/regions.
Menu Language: Set the default language for the
TV menu.
Audio Language
Primary Audio: Set the default audio output
language for the type of digital broadcast content
that you are viewing.
Secondary Audio: Set the secondary audio output
language for digital broadcast content.
Use Voice Service
Press the button on your remote control and Home
select Settings>System>Voice Service.
Use your voice to control the TV, other smart home
devices and more.
Use Parental Control PIN
Press the button on your remote control and Home
select .Settings>System>Parental Control PIN
Change the PIN that you use to access Parental
Control, Auto Channel Scan and Reset to Factory
Defaults.
Use Parental Control
Press the button on your remote control and Home
select .Settings>System>Parental Control
Turn on Parental Controls to prevent children from
being able to view certain content.
Set Application Settings
Press the button on your remote control and Home
select .Settings>System>Application Settings
Setup application preferences.
Advanced Settings
Press the button on your remote control and Home
select .Settings>System>Advanced Settings
Access the Advanced Settings menu.
Auto Init Mode: TV will automatically initialise in the
background when AC power is on.

English - 32 -
Fast Power On: Enable TV fast start-up feature.
Power On Mode: The TV will turn on in the selected
mode when the main power is reconnected.
Default Startup Page: Set the page that rst appears
when the TV is powered on.
Screensaver: Activate a screensaver when your TV
displays a still image for a period of time. Set the time
according to your preference.
Note: This function may not be applicable in some models/
countries/regions.
Switch o Curtain: Set how quickly the screen Curtain
will close when entering standby.
Sports Mode Auto Detection: Enable auto detection
of Sports content allowing TV to automatically select
Sports Sound Picture mode in and settings.
Usage Mode: Select Home mode or Store mode.
Enhanced Viewing Settings: VIDAA offers an
Enhanced Viewing Service, which uses Automatic
Content Recognition ("ACR") technology to collect
certain data from this Smart TV, including this Smart
TV's identier, IP address, and viewed content and
ads information (together "Viewing Data"). To learn
more about each Enhanced Viewing Service feature,
you may select any of the settings on the screen for a
description. Your settings can be changed at any time
in the Smart TV's menu.Settings
Personalised Ads
Personalised Ads: Turning o personalised ads will
limit the ability to deliver relevant ads to you but will
not reduce the number of ads you receive.
Reset Ads ID: Ads ID is a unique and resettable ID
for personal ads. A new Ads ID will be assigned to
your device when you reset it.
Note: This function may not be applicable in some models/
countries/regions.
Support
You can set up support settings.
Note: The menus displayed vary depending on models/
countries/regions.
About
View the TV's software version and hardware version.
System Update
Press the button on your remote control and Home
select Settings>Support>System Update.
Set your TV to receive the latest software.
Auto Update: When enabled, your device will be
updated with the latest software automatically.
Check Update: Check to ensure that your TV has
received the latest software.
Please ensure your TV is connected to the Internet.
Check OAD Update: Check to ensure that your TV
has received the latest software via the tuner.
Note:
• Please ensure your TV is connected to the Internet.
• This function is only applicable when Thailand and Malaysia
are selected in Location.
Update from USB: Upgrade TV software from USB
device.
Note:
• Please ensure the USB ash drive is inserted to the USB
2.0 port of the TV.
• The update les must be located in the root directory of the
update USB device.
• The format of the USB must be FAT32 and the partition table
type must be MBR.
E-Manual
Press the button on your remote control and Home
select Settings>Support>E-Manual.
Launch the E-Manual and learn more about your TV.
Self Diagnosis
Press the button on your remote control and Home
select Settings>Support>Self Diagnosis.
Perform self diagnosis to test sound, picture and
connections.
Network Connection Status: View the TV's network
connection information.
Network Connection Test: Perform this test to check
the network connection.
Network Speed Test: Perform this test to check the
network speed.
Input Connection Test: Show all external input
connection status.
Status Check: Check the status of this TV by showing
any error codes.
Signal Info: Show the signal information of current
input.
Disclaimer and Privacy
Press the button on your remote control and Home
select Settings>Support>Disclaimer and Privacy>-
Data Sharing, Privacy and EULA
Read the Disclaimer Details and Data Protection
Policy. Allow/Deny your consent to the listed polices
relating to the collection of User/Network data.
Press the button on your remote control and Home
select Settings>Support>Disclaimer and Priva-
cy>Open Source License.
Display Open Source Software licence information.
Press the button on your remote control and Home
select Settings>Support>Disclaimer and Priva-
cy>Remove User Data.
Produkspesifikasjoner
| Merke: | Toshiba |
| Kategori: | Fjernsyn |
| Modell: | 75UV2F53DB |
Trenger du hjelp?
Hvis du trenger hjelp med Toshiba 75UV2F53DB still et spørsmål nedenfor, og andre brukere vil svare deg
Fjernsyn Toshiba Manualer

12 Februar 2025
14 Januar 2025
14 Januar 2025
14 Januar 2025
14 Januar 2025
14 Januar 2025
14 Januar 2025
14 Januar 2025
14 Januar 2025
14 Januar 2025
Fjernsyn Manualer
- Fjernsyn Thomson
- Fjernsyn Haier
- Fjernsyn Bauhn
- Fjernsyn Insignia
- Fjernsyn Denver
- Fjernsyn LG
- Fjernsyn Grundig
- Fjernsyn Hisense
- Fjernsyn Sharp
- Fjernsyn Arcelik
- Fjernsyn AOC
- Fjernsyn Philips
- Fjernsyn TCL
- Fjernsyn Reflexion
- Fjernsyn Samsung
- Fjernsyn Kogan
- Fjernsyn Sony
- Fjernsyn GoGEN
- Fjernsyn Pioneer
- Fjernsyn Panasonic
- Fjernsyn Vox
- Fjernsyn Sencor
- Fjernsyn Cello
- Fjernsyn Medion
- Fjernsyn RCA
- Fjernsyn Hyundai
- Fjernsyn Chiq
- Fjernsyn Nevir
- Fjernsyn Infiniton
- Fjernsyn Blaupunkt
- Fjernsyn Mitsubishi
- Fjernsyn Megasat
- Fjernsyn Nedis
- Fjernsyn Mitsai
- Fjernsyn Vivax
- Fjernsyn Element
- Fjernsyn JTC
- Fjernsyn Vizio
- Fjernsyn Proscan
- Fjernsyn Metz
- Fjernsyn Mystery
- Fjernsyn CGV
- Fjernsyn Doffler
- Fjernsyn Elements
- Fjernsyn FOX Electronics
- Fjernsyn Voxicon
- Fjernsyn Salora
- Fjernsyn Manta
- Fjernsyn Mitchell & Brown
- Fjernsyn Aconatic
- Fjernsyn Continental Edison
- Fjernsyn MBM
- Fjernsyn Schaub Lorenz
- Fjernsyn Strong
- Fjernsyn FFalcon
- Fjernsyn SYLVOX
- Fjernsyn Dyon
- Fjernsyn QBell Technology
- Fjernsyn Peerless-AV
- Fjernsyn Nokia
- Fjernsyn Akai
- Fjernsyn Qilive
- Fjernsyn Xoro
- Fjernsyn Telefunken
- Fjernsyn Engel
- Fjernsyn Jay-tech
- Fjernsyn SEIKI
- Fjernsyn TELE System
- Fjernsyn Magnavox
- Fjernsyn Luxor
- Fjernsyn Linsar
Nyeste Fjernsyn Manualer
28 Mars 2025

28 Mars 2025
28 Mars 2025
26 Mars 2025
19 Mars 2025
19 Mars 2025

13 Mars 2025
13 Mars 2025
13 Mars 2025
13 Mars 2025